PAR Pine Wine Display Case
Posted by Neela Ngwenya in How To Guides
PAR Pine Wine Display Case
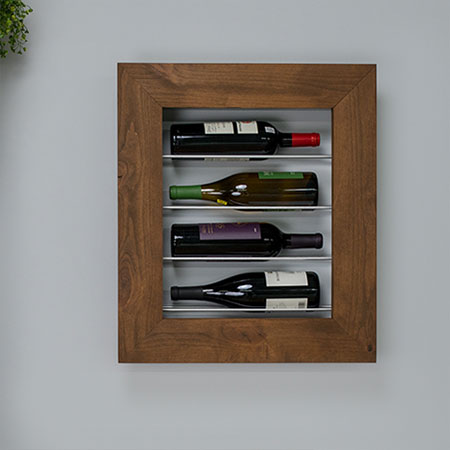
Perfect for displaying your favourite wines, this clever display case is designed as a ‘floating’ wine case that shows off your wine collection.
30/11/2018
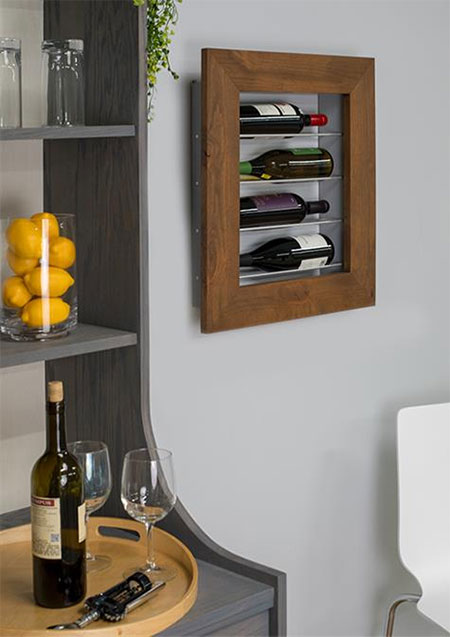
Another clever project from the guys at Build Something, this wine display case is made using PAR pine to create a ‘floating’ wine display that shows off your wine collection. It’s also a great gift idea to give to someone who loves wine.
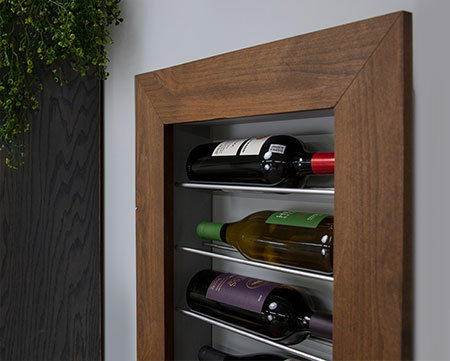
The box and frame are made of PAR pine and thin aluminium rods hold the wine bottles, plus all the tools, materials and supplies for this project can be purchased at Builders Warehouse.

Once you’ve made the wine display case, you can stain, seal, varnish or paint the frame in your desired choice of finishing.
YOU WILL NEED:
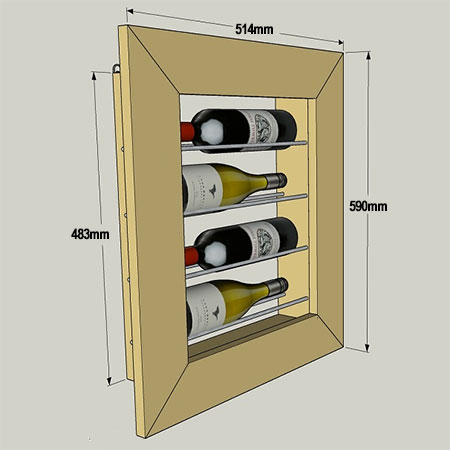
2 of 19 x 94 x 362mm pine – Box Top/Bottom
2 of 19 x 94 x 483mm pine – Box Side
2 of 19 x 94 x 514mm pine – Frame Top/Bottom
2 of 19 x 94 x 590mm pine – Frame Side
4 of Aluminum rod, cut to [8] 400mm lengths
32mm coarse-thread pocket hole screws [20]
Wood glue
2 Picture hangers
2 Nylon wall plugs
TOOLS:
Drill / Driver plus assorted bits
Kreg pocket hole jig
Mitre saw
Orbital sander plus 120- and 240-grit sanding pads
Clamps
Workbench
Tape measure and pencil
Carpenter’s square
HERE’S HOW:
Make the box
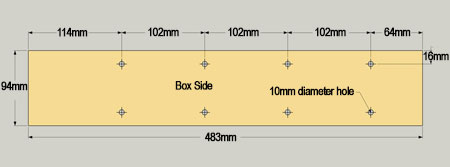
1. Set your jig for 19mm-thick material and drill pocket holes in both boards at the locations shown above. There are two pocket holes at each end, plus two along one edge. These will be used to attach the frame later on.
GOOD TO KNOW: Check the thickness of your PAR pine to ensure the thickness is the same, or adjust accordingly.
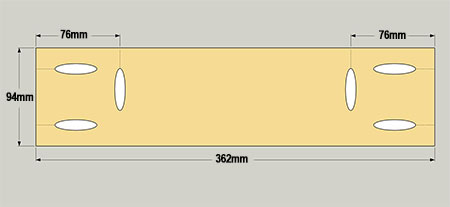
2. On one Box Side mark the locations for drilling the holes for the aluminium rods that will support the wine bottles. Position the Sides – with the marked piece on top – so that the ends and edges are flush. Place them on a scrap of board and clamp. Drill holes the same diameter as the aluminium rod through both boards at the same time so that they will be aligned.
GOOD TO KNOW: The drilled holes need to be straight to allow the rods to slide in easily.
GOOD TO KNOW: Sand all the box sections before assembly. Sand the outside faces of the box once assembled.
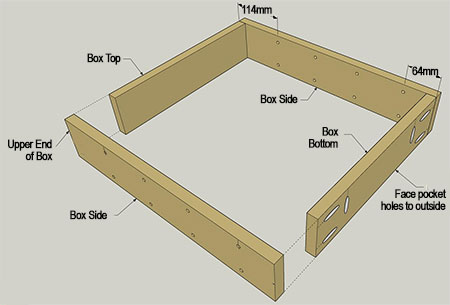
3. Apply wood glue to the ends of the Top and Bottom and align the Sides, as shown below. Check that the holes in the sides are aligned, with the larger space at what will be the top of the wine rack. Clamp the sections and secure the Top and Bottom to the Sides with screws.
GOOD TO KNOW: The box in this project was painted in a colour that matches the wall where the wine display is mounted.
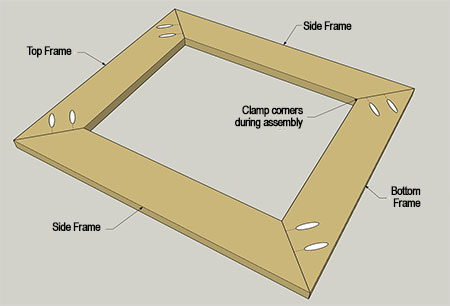
4. Cut the ends of both Top and Side frames at 45°. Test fit them to make sure the mitered corners align properly without gaps before drilling pocket holes in just the Short Frames, as shown below.
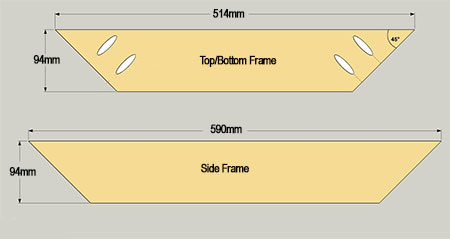
5. Apply wood glue to the edges of the Side Frames and secure to the Top and Bottom Frame using screws. Clamp the joints to keep the faces flush and the corners aligned as you drive in the screws. After the glue dries, you can sand the frame and apply the stain or finish of your choice. We used a dark walnut gel stain.
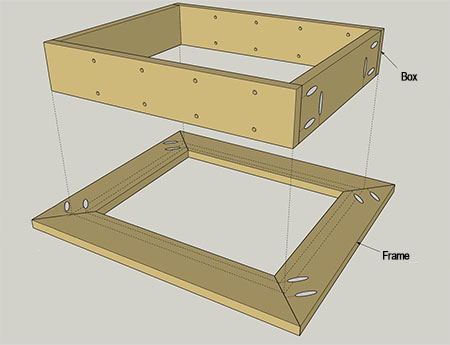
6. Lay the frame face down and position the Box in place on the back of the frame. Make sure it overhangs all round. Secure the Box to the Frame with screws.
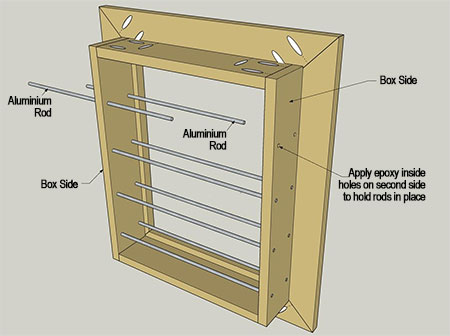
7. To install the aluminium Rods, slide them through the Sides. Place a small dab of epoxy in the hole on the second side to hold the rods firmly in place.
![]()
Comments
Add comment